
|
Classes
#1 The Overall Plan #2 Getting Organized #3 Using weebly #4 Getting Started #5 Building Your Pages #6 "About Me" Page #7 How to Buy a Painting" Page #8 "Events Page" #9 Creating Your Store #10 Creating Your Storefront #11 "Workshops" Page #12 Creating a Blog #13 Adding Videos to Your Site #14 Adding a Gallery #15 Creating a Form #16 Mobile Analytics #17 webinARTs Forum #18 Additional Elements #19 Finalizing the Home Page #20 Fine Tuning Your Website |
The Overall PlanEvery artist needs to be organized when it comes to selling their art. It's a big job, especially when there seem to be about a million new ideas that pop up on the internet every week. My goal is to filter that information and present it to you in an organized and manageable process. For the next twenty days we'll explore a lot of concepts and ideas. To start out we are going to spend the first week focusing on websites. By the end of the week each of you will have a new website. Even if you already have a website I'd like you to design one. Because what you will learn this week will also greatly help you improve the website you have got!
So let's talk first about selling your art. Most of us would love to sell all of our art through galleries. Unfortunately it's not that easy. We can't sit back and wait for the galleries to knock on our door. Instead we need to promote our art and create a demand so collectors and galleries will be interested. Some of us have been selling our art for a few years. Others haven't started selling. Regardless, we all need a plan to sell more art. |
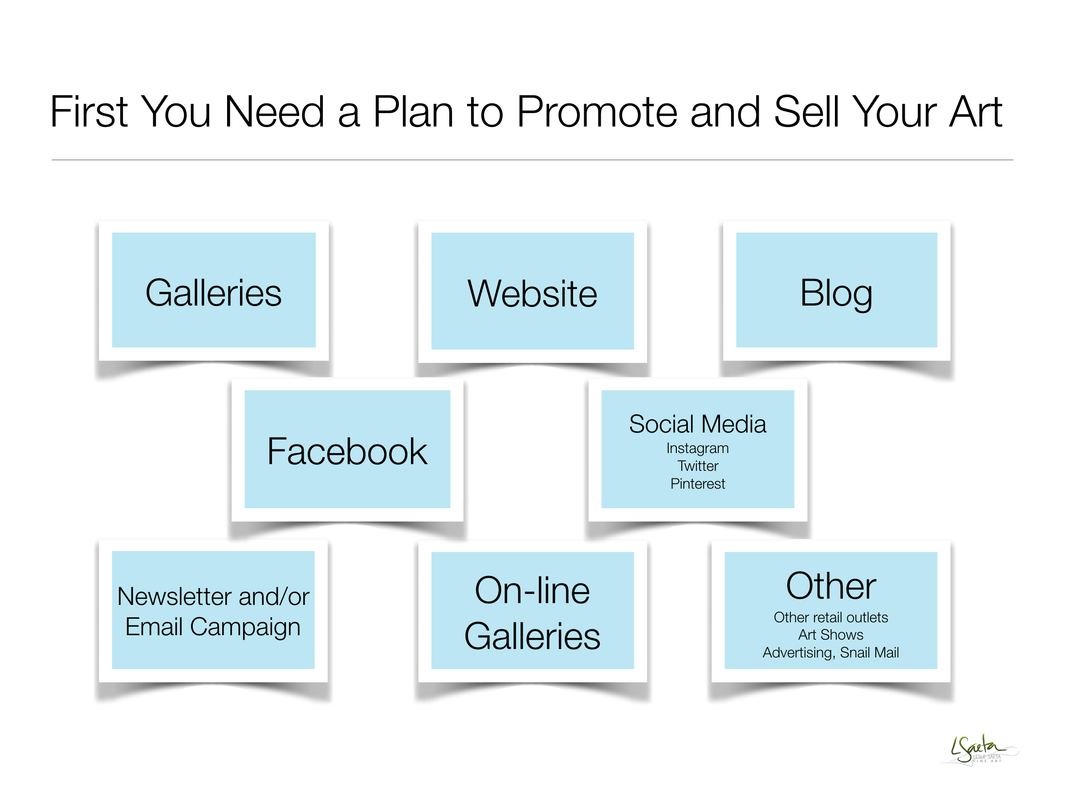
In the above diagram, I have included what I consider to be the most common ways to promote and sell your art. Actually this concept applies to ANY business, not just art. If you are taking this class as a small business owner or a gallery owner, everything here applies to you as well.
Galleries are by far the most traditional place to sell art. There are over one billion websites on the internet today so it's not unusual for artists to have a website. If you don't have one, you will by the end of this course. If you already have one then we will just make yours better. Blogs are a great way to have a conversation with your art friends, fans and collectors. Social media, including Facebook, Google+, Instagram, Twitter and Pinterest are some of the best ways to reach out to your "friends". There are also newsletters and on-line galleries. Many artists also sell their art through art shows, retail outlets, advertising, mailings and teaching workshops.
In this webinARTs course we'll talk about all of these ways to promote and sell your art. How many of these do you use regularly to promote your art? Stop for a minute and write each of these down. Then make a note as to how often you use each of these to promote your art.
What happens if you only sell your art in galleries? Do you still need to promote your art in these other outlets? Of course! It doesn't matter how or where you sell your art. You always need to promote it. Look at the diagram below. Artists should promote their galleries through their websites, blog, Facebook, social media, newsletter and other resources.

Let's assume you are not selling enough of your art through galleries. Or you are not ready to approach galleries. So let's remove the "gallery option" from our chart for now and discuss how you can promote and sell your art.

Let's focus on these seven ways listed above to promote your art.
Since you probably don't own your own gallery and thus you don't have a physical location to sell your art, you have to promote and sell your art on-line. But before you do anything you have to have a store to sell your art. There has to be somewhere your customers can go to see your art, learn more about it and buy it. Your website is your store.
Since you probably don't own your own gallery and thus you don't have a physical location to sell your art, you have to promote and sell your art on-line. But before you do anything you have to have a store to sell your art. There has to be somewhere your customers can go to see your art, learn more about it and buy it. Your website is your store.
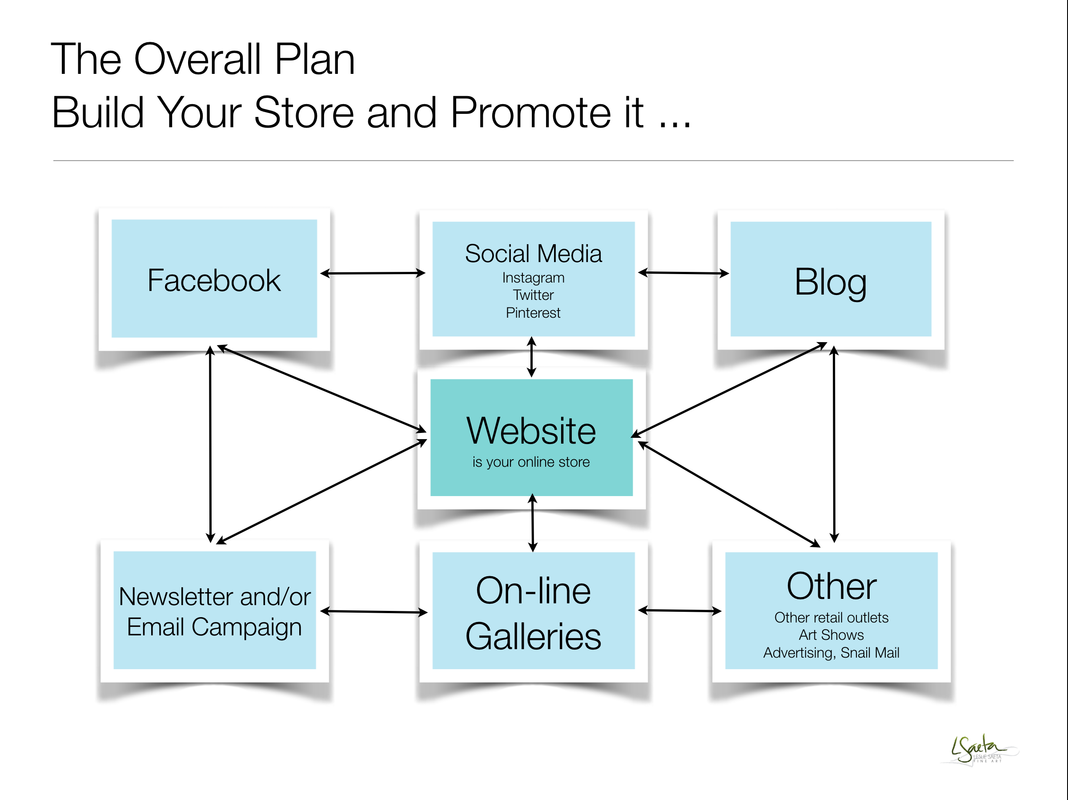
#1 - Watch the video below and I'll further explain how this works.
|
Tip - When you watch a webinARTs video you can click on the letters HD to watch it in high definition. If it's not clear then click on the HD and select the highest resolution available. Also you can click on the expand button (with the four arrows) to enlarge the video and watch it in full screen.
|

|
It is important that all of the items you use to promote your art (website, blog, Facebook, newsletters, etc.) have a universal look and feel. It's these elements that create your "brand". Your brand is your name, the photos and the "look and feel" that identifies you and your art. All of your marketing tools should have the same look and feel so that visitors start to recognize you and your brand. If you don't use the same look on your website, blog, Facebook fanpage and newsletter then you can confuse your buyers. Don't miss the chance to create brand identity with your fans.
Take some time to look at your website, blog, Facebook Timeline and Facebook Fanpage. Print out the first pages of these sites and put them side by side. Now compare them all. Do they all have a coordinated look?
Take some time to look at your website, blog, Facebook Timeline and Facebook Fanpage. Print out the first pages of these sites and put them side by side. Now compare them all. Do they all have a coordinated look?
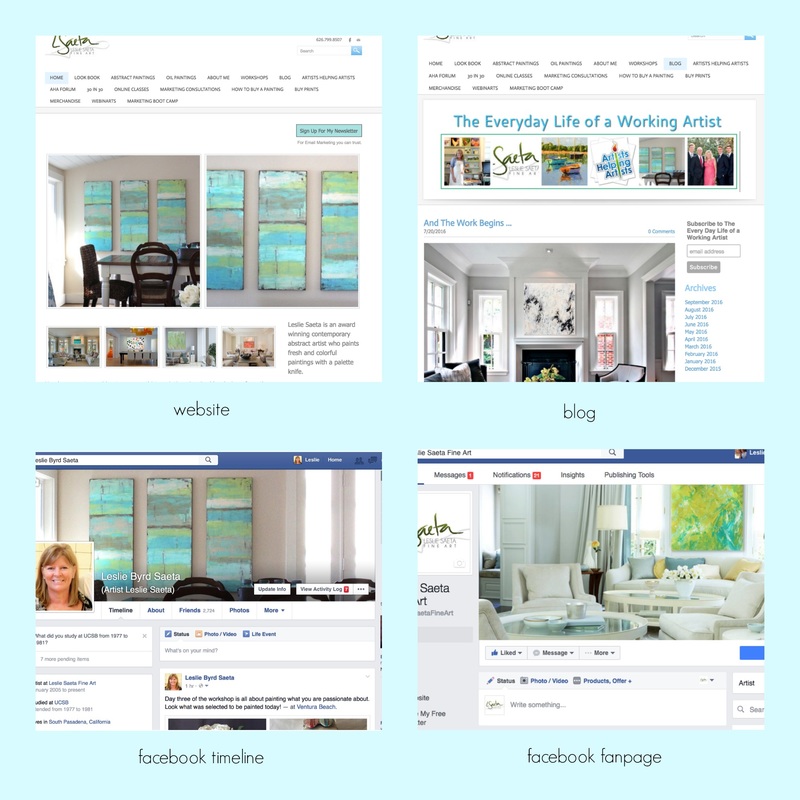
Here are the front pages of my website, blog, Facebok Timeline and Fanpage . See how well coordinated they are? I chose aqua and green as my color scheme, my logo and a few photos to feature as my headers. These all create a unified look and feel on all four of my sites.
If you don't have any or all of these sites, don't panic. You will. But if the sites you have don't look similar then you need to decide which photo(s) you think best represents you as an artist. Pick one or a few. IF you already have these sites it's time to create an entirely new look.
How do you do this? First, visit the sites of your favorite artists. What is it that you like about their websites? Is there a layout or format that you would like to also use? Is there a color (or colors) you are drawn to? The next step is go through your portfolio of paintings and select a few of your favorites. Most people are surprised I didn't select a seascape painting to use as my header. But I liked the horizontal abstract painting, colors and the way it painting looked in the photo from my beach house.
A few years ago I opted to have a logo designed for my art. You DO NOT need a logo at this time. But when you are ready then on-line options are very affordable. The logo depicts the signature I use to sign my paintings and also a palette knife. (I used a site called logo tournament but there are lots of other on-line sites you can use too. Just google "online logo design sites" and you will see how many affordable options there are!)
Before our next class, you need to:
I hate to give more homework, but in addition to the assignment above, please go to the on-line website builder Weebly and sign up for a free account. Just sign up for the free account and don't buy a domain for your site. I am going to show you how to build a website from scratch using weebly. You won't believe how easy and great it looks!
If you liked today's class, feel free to share your thoughts about the class on our class forum! Also, feel free to post questions and provide your answers.
- Select between one and three paintings to use in the header of your websites.
- Choose a color scheme (one to three colors is best).
- Select anything else you want to include in the "look and feel" (such as a logo).
I hate to give more homework, but in addition to the assignment above, please go to the on-line website builder Weebly and sign up for a free account. Just sign up for the free account and don't buy a domain for your site. I am going to show you how to build a website from scratch using weebly. You won't believe how easy and great it looks!
If you liked today's class, feel free to share your thoughts about the class on our class forum! Also, feel free to post questions and provide your answers.