
 I am not sure why as artists we don't aggressively seek out new clients. Instead, we post our paintings on social media and hope for a sale. Or we send our paintings to new galleries and keep our fingers crossed.
Having grown up in the world of sales and marketing I know that my sales results will be a lot better if I work hard at making sure a lot of people see my art. That's why I have started a very aggressive campaign introducing my abstract paintings to interior designers. Managing an email campaign and following up on responses and leads can be a nightmare. But there are some great email tools that integrate with standard email programs that help you do this. I am in the process of switching from Outlook to Gmail so I can use an amazing CRM program. I know, you probably have never heard of CRM. I hadn't either. It stands for Customer Relationship Management and it does exactly that. It's an App that integrates into your email system, shows who has opened your emails, and allows you to respond using great templates you have created via email. It makes the whole process of reaching out to potential clients a lot easier than we have done in the past. For example, let's say you send out an email featuring three of your paintings. When one of the email recipients opens the email you are notified. When they click a link to one of your paintings you are also notified. That's when you can send an email (that is already created in a template) featuring the painting they linked plus other similar paintings. And it all happens with one click. Imagine how great this could be if you sent out hundreds of emails. I will be writing a lot more about this in the future but I just wanted to get you thinking. Who are your potential clients? How do you find a list with email addresses for all of them? What kind of emails might get them to click on a link to your website? I will answer these questions and more in the future. I promise. Does this sound interesting to you?
5 Comments
I have been m making a lot of progress in my new vegetable garden. Everything is planted and I am seeing lots of progress. Although I think I need to stop checking for new growth multiple times a day. I doubt staring at my plants will make anything grow faster!
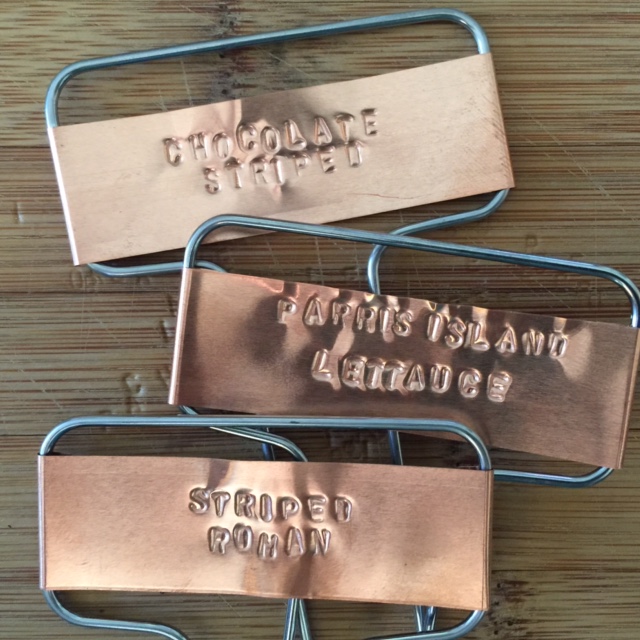
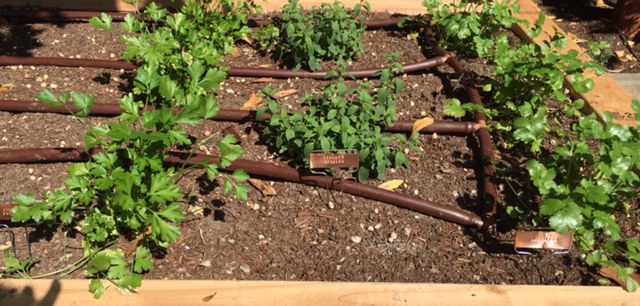
I bought some plants at an amazing nursery in Los Angeles called Two Dog Organic Nursery. It's the only certified organic nursery in LA and everyone there is so nice! I bought lettuce, corn, beets, pumpkin, squash, carrots and more tomato plants there. I know, more tomato plants? In a few months I will be inundated with home grown tomatoes. Oh darn. By then I will have researched how to can fresh tomatoes! I also bought two blueberry bushes at the nursery. The berries are delicious! I doubt whether any ripe blueberries will ever make it in to the house. They have become my "gardening treat!" The drip system is in but we haven't turned it on yet. We had lots of rain last week and the beds are still quite damp. I also figured out how to tag my plants. At first I thought I would write the names on wooden popsicle sticks with a sharpie. But I had some that came with a few of my tomato plants and the writing has already disappeared. Luckily I found some copper markers at Home Depot. They cost $2.94 for a four pack and I used my metal letter stamps to add the names of my vegetables. I will warn you the stamping of letters is very labor intensive but it is so worth it. They look great! 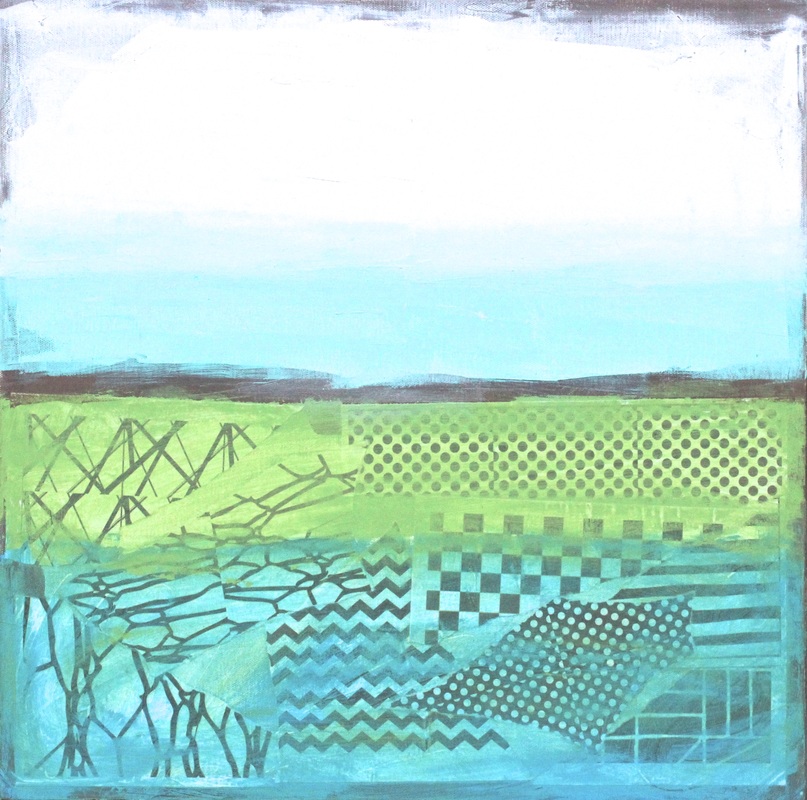 Sometimes being an artist isn't fun. It's a lonely job and occasionally we get in a slump. Self-doubt is brutal and it's easy on any given day to ask yourself, "Why am I doing this?".
I honestly don't know what the "negative triggers" are that cause us to get in these slumps. But they are real. Often too real. The first thing we all need to realize is that "slumps do happen". They are normal in any job, especially ones that utilize and require creative energy. So just accept them and understand that they will pass. Last month I traveled on the road for almost three weeks, got caught up in my son's college volleyball games and built a new (and very exciting) vegetable garden. Plus I taught a three day workshop in South Pasadena. To be honest, the thought of painting just hadn't been a priority these past few weeks. So rather than grasp and enjoy these "diversions" I beat myself up and felt very guilty for not spending time in my studio. And yes, I know that is ridiculous. I know that I needed to embrace everyday and enjoy every minute! But it happens. To all of us. All of the time. So what should we do? Stop creating guilt and negative energy. Duh. So here is what I did. First thing, I made a list of everything I wanted to complete for the week and broke it down day by day. Then I started attacking the list with vigor. Every time I completed a task I crossed it off. And that felt good. I am painting a ton now and feel very good about it. And the things I needed to get done are getting done. And the guilt is gone. Yippee.  Instagram is one of the best marketing tools available today. At least, according to me. Haha. I love it and I think it works for me because I have defined my audience and I only use it to promote my abstract paintings. It takes discipline but it has paid off!
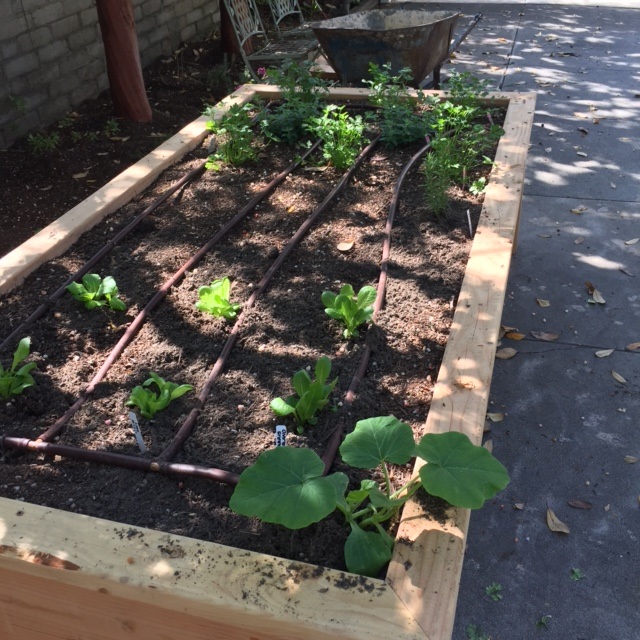
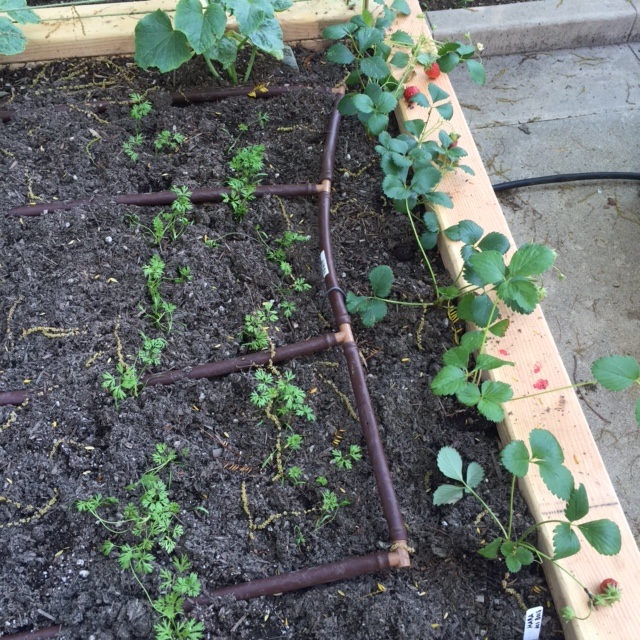
I found some pretty cool instagram tips that I would like to share with you. 1. UPLOAD MORE THAN JUST SQUARE PICSOnce known for smartphone friendly square pics, Instagram now allows more dimensions. You can upload photos and videos in portrait or landscape. Just tap the little arrows in the lower left hand corner to switch to the full image. 2. BOOMERANG IT! If you want Instagram’s latest fun effect, you won’t find it inside the app. You’ll have to download their new app called Boomerang. It only has one button - press it and Boomerang takes a one second burst of pics, then stitches them together like a Flipbook, playing them back and forth in one endless loop. It’s a ton of fun… and you can share to Instagram in one click. 3. GET CREATIVE WITH VIDEO When you're taking video on Instagram, you're not limited to just one clip. Press and hold to record, then press and hold to record again. Instagram will stitch your clips together so you can get super creative. Need a do-over? Hit delete twice to get rid of your last clip. 4. GET NOTIFIED WHEN A SPECIFIC FRIEND POSTS INSTANTLY This is my favorite Instagram secret, and lets me know when specific friends post instantly. Just go to a friend's (or potential customer's!!) profile page and look for the menu button in the upper right hand corner. Tap it and select “turn on post notifications." Now you will get a notification as soon as they hit post. Just be sure to comment… "first!" Have fun! 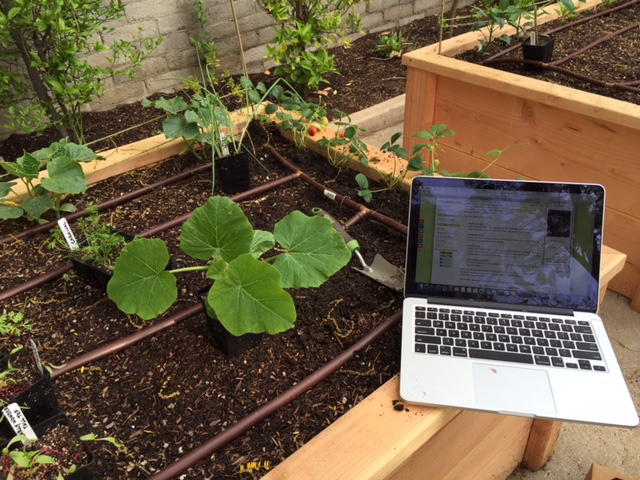 I am not sure if there are many gardeners who use their laptop to garden. But how else am I supposed to learn how to plant all of vegetables? Can you see my strawberries in this picture? Yippee. I heard today that a billion people sign in to Facebook everyday. Holy smokes. That's a lot of people.
It is hard to keep up on all of the latest updates and features on Facebook. I thought you might like it if I share a few. 1. Use Search to Find an Older Post Sometimes, you'll think of something you saw on your Facebook News Feed but can't remember who posted it or what the exact details were. With the search bar, you can type in specific phrases like "key lime pie," hit return, and the results will show which one of your friends or pages you follow recently mentioned it. 2. Send money to a friend or one of your kids! Owe money to a friend? Available only in the Messenger app, you can tap “pay” or the “$” icon and send cash. So far, you can only use a debit card to send and receive payments. 3. Save Content For Later Did you know you can save links, videos, and events to your own personal "Saved" tab on Facebook? Just hit the drop-down menu on a post and click "Save link." Then go to the More bar on mobile or the Favorites panel on desktop and access what you've saved. Easy, right? 4. Customize Your News Feed Make Facebook yours again with three options: set a preference to always see a certain friend or page’s posts first, unfollow a friend’s posts, or refollow a page or friend again. It'll help declutter the noise on your feed. To get to this, click the lock icon on the top right of Facebook and tap "News Feed Preferences." Do you have any Facebook tips to share with us?  On the Cape 12" x 16" Available I loved the Artists Helping Artists show this week. It's all about how you can evaluate your own artwork. I think it's a really great show as we all need to have a way to evaluate our work.
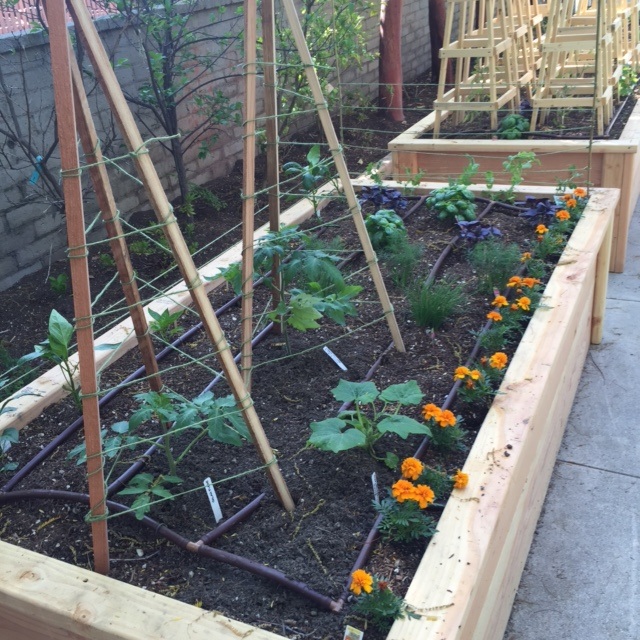
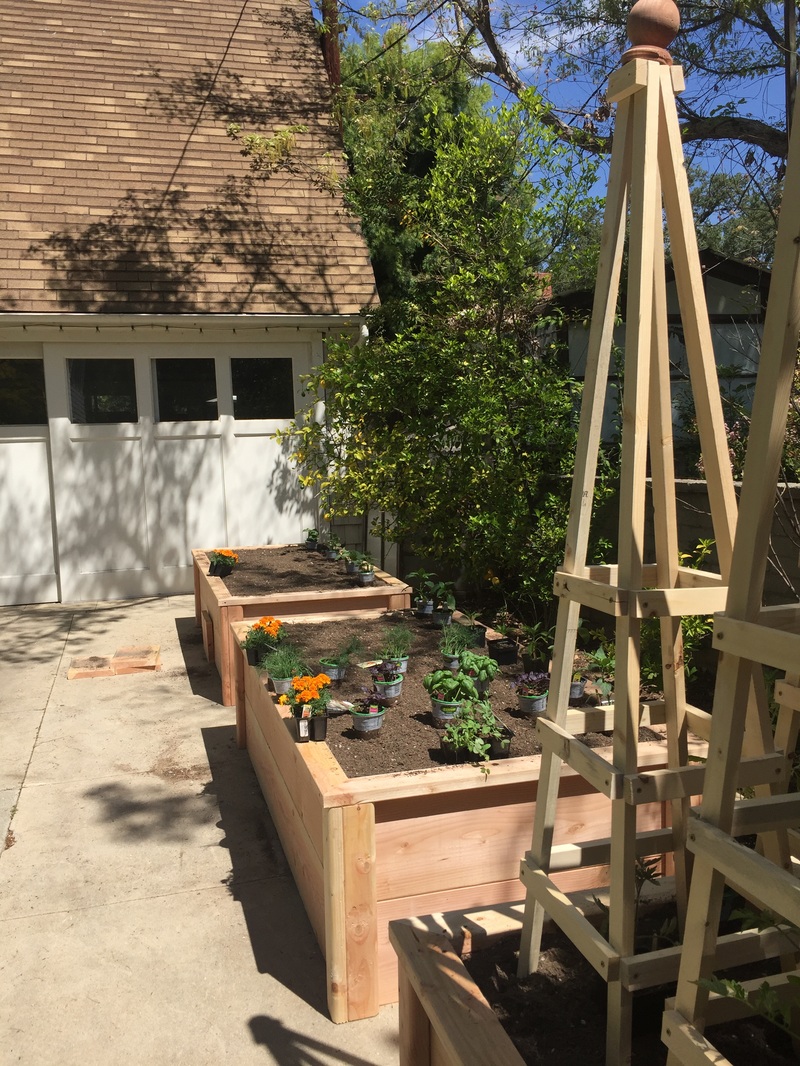
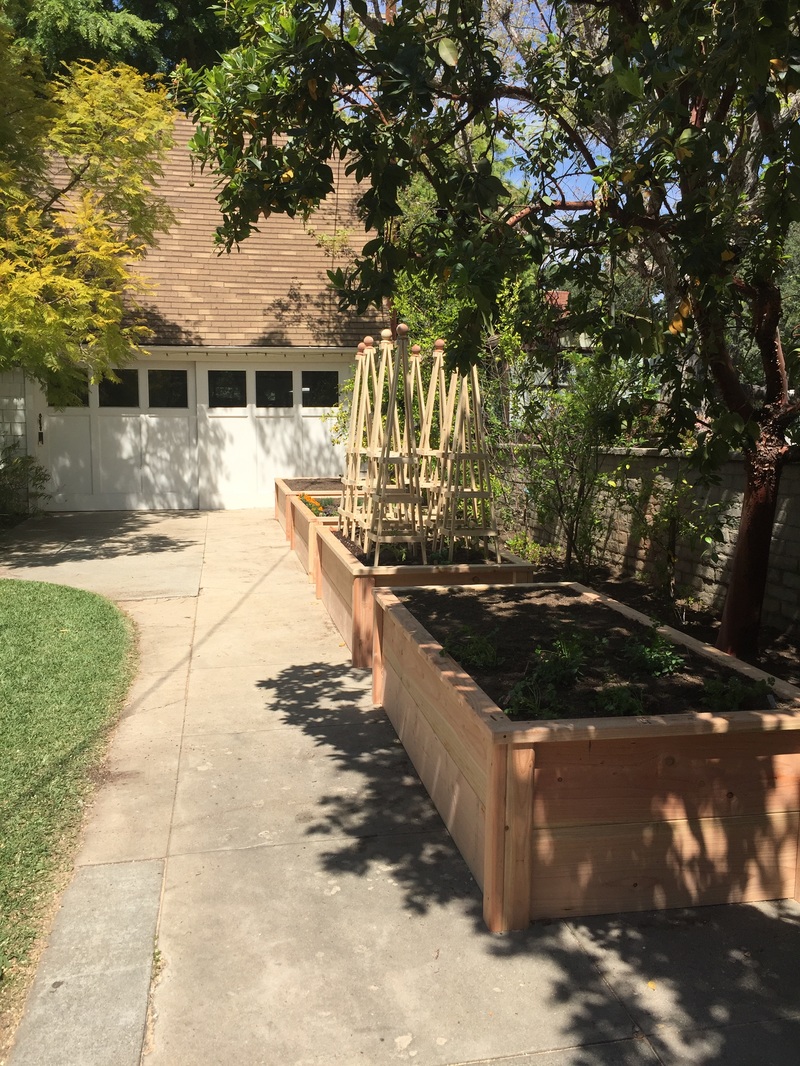
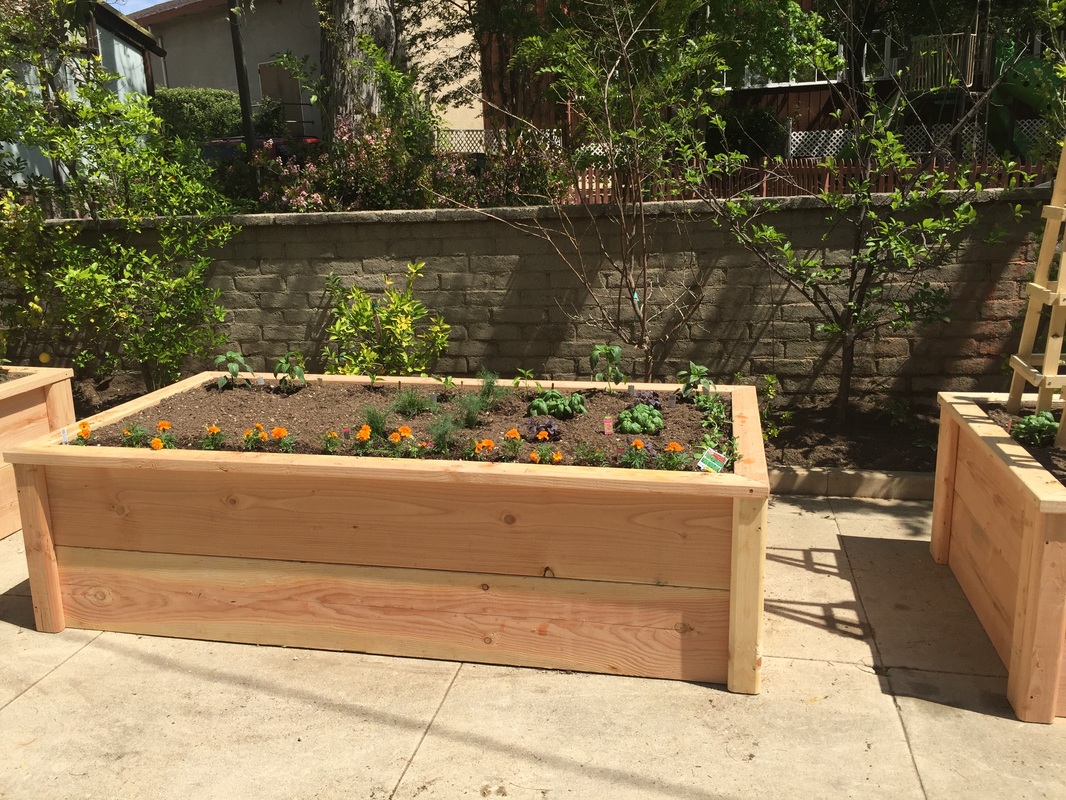
On the show we talked about a check list that was written by Greg Manchess on his blog. It's an excellent list that you can use to evaluate your work. And here it is. Some of the ways you can evaluate your work include: Line - Are there elements that help move your eye through the painting? The last thing you want is for the viewers eye to be lead right off of the canvas. - Do the lines of the composition move you from the main design elements to the minor elements? - Do those lines add a sense of rhythm or a lyrical quality? - Does the painting have a dimensional quality? - Is there a foreground, middle ground, and background? - Does the perspective work? Do the lines of perspective all fade to one horizon line? Area, Space - Is there a coherent quality throughout the painting? Harmony makes for consistency. - Have you painted anything that isn’t really necessary for the success of the painting? If it’s too busy, the main point of the painting could be lost. - Ask yourself if you can add, or subtract, anything from the painting. Value - Does the value range from light to dark? - Have you determined the “key” of the painting, and stayed consistent with it? - Are the darks dark enough? Often this can improve a weak painting. Light - Light can be the most challenging and interesting part of a painting. Have you used it effectively? - Does the light source make sense? Have you correctly and consistency placed the shadows? - With the use of different colors, you have the opportunity to ask your self the classic questions: lighter or darker, warmer or cooler? Form and Shape • Have you used different and unique shapes in your painting? • Can you add interest with shapes, edges, subjects...? • Can you use contrast (light, color, texture) to add interest or direction of design. Cropping - Consider cropping some objects for interest. Use the positive and negative spaces to create interest. Think about how the scale of the objects can change your perception. Color - Have you varied the colors? - Be sure you have effectively used neutrals (grays) to contract with pure and bright colors. - Remember that the contrast of dull neutrals will brighten the colors placed beside it. Your Point of View - Does the painting represent your point of view as the artist? - Does it look consistent with your work? Ot doesn’t have to “match” but within the other paintings in it’s style, does this one “fit”? -Do you need to adjust anything? Values, colors, pops of color? How can you make it sing? Focus - Ask yourself where your eye is drawn to in the painting? - Is the overall composition pleasing or confusing to the viewer? Texture - Is the piece too flat or too busy? - Is there a contrast between flat and smooth textures? Above all else, is the painting as good as it can be? You began with an idea, an inspiration, a desire to create something where there was only a white canvas. Sometimes the best thing you can do is turn the painting away for a while, be it hours or days, you will return to it with fresh eyes and a better objective point of view. I can't tell you how happy I am with my new raised bed vegetable garden! Here is what I planted: tomatoes (heirloom), peppers, cucumbers, beets, onions, lettuce, spinach, corn, sweet peas, basil, edamame, carrots, parsley, cilantro, oregano and marigolds. In less than two months time we will all be enjoying some very amazing healthy meals.
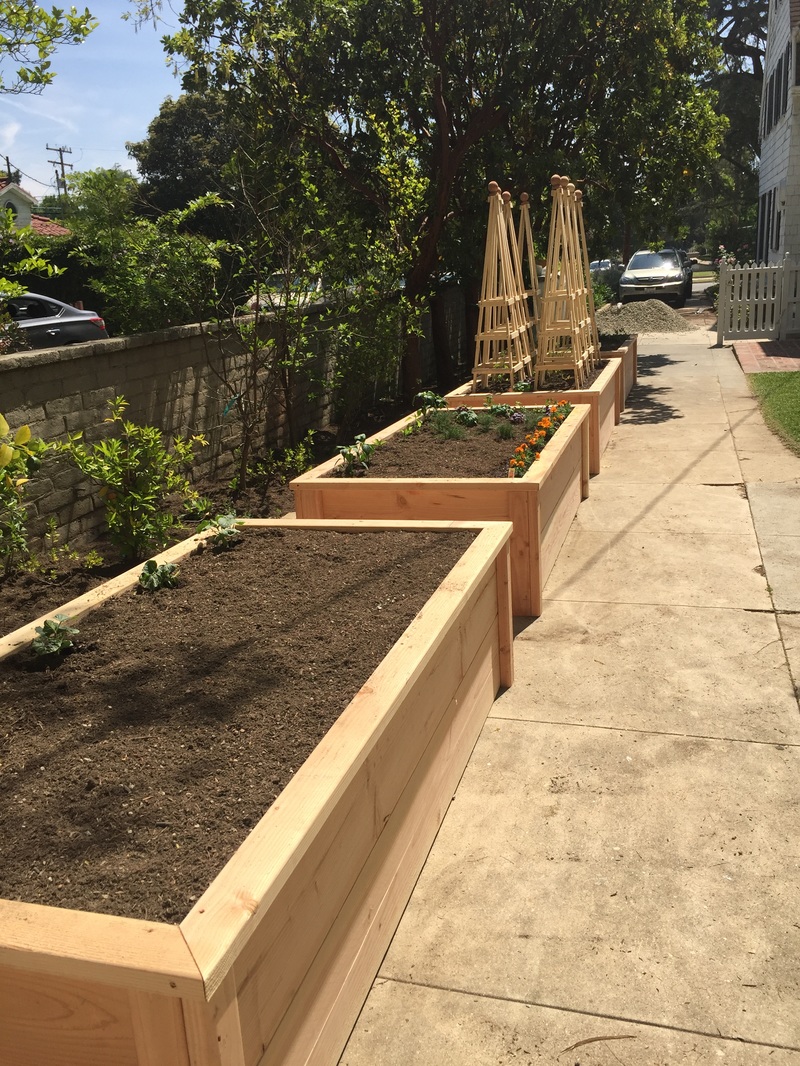
I am adding a drip irrigation system in the next few weeks. And I added some trellises to hold the sweet peas, cucumbers and peppers. The garden is 100% organic and I love the fact I pass by my garden everytime I head to my studio. I can't wait for my first harvest! 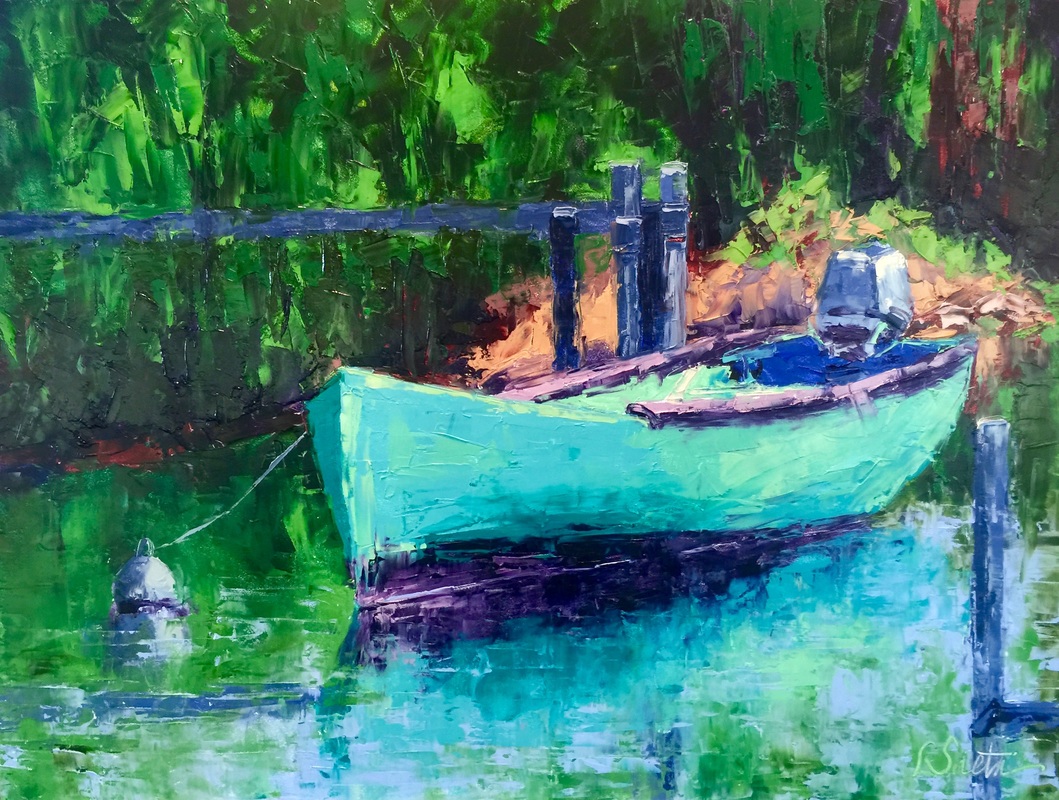 Ok. So first off I need to apologize to all of the non-iphone readers of my blog. I am sorry that today's post is limited to iPhone users. Sadly, I don't know the Android or Samsung phone well enough to offer any tips.
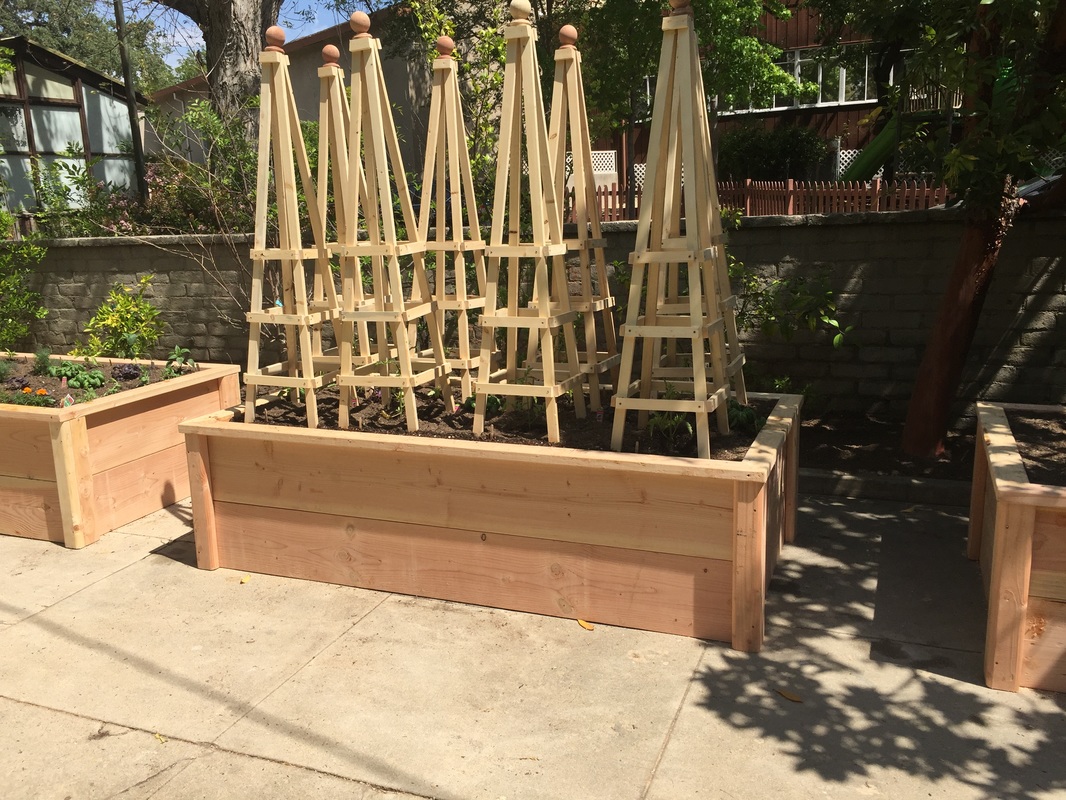
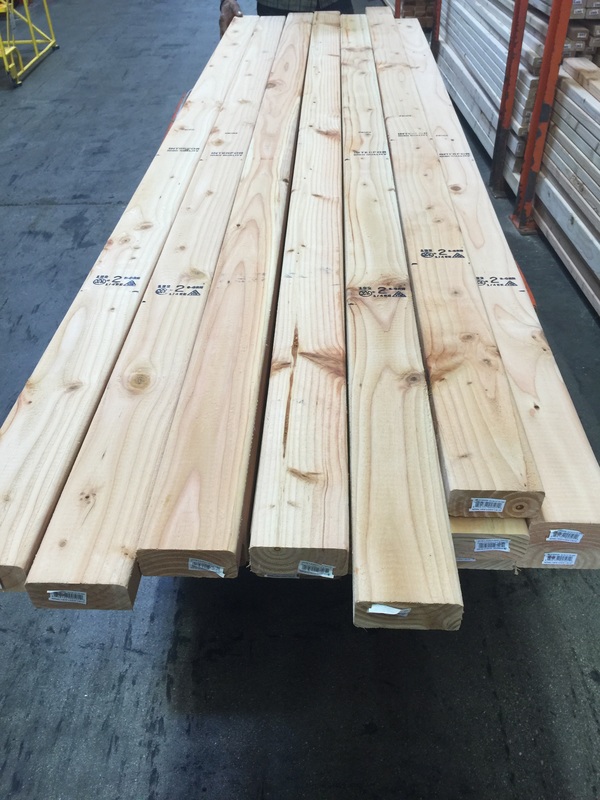
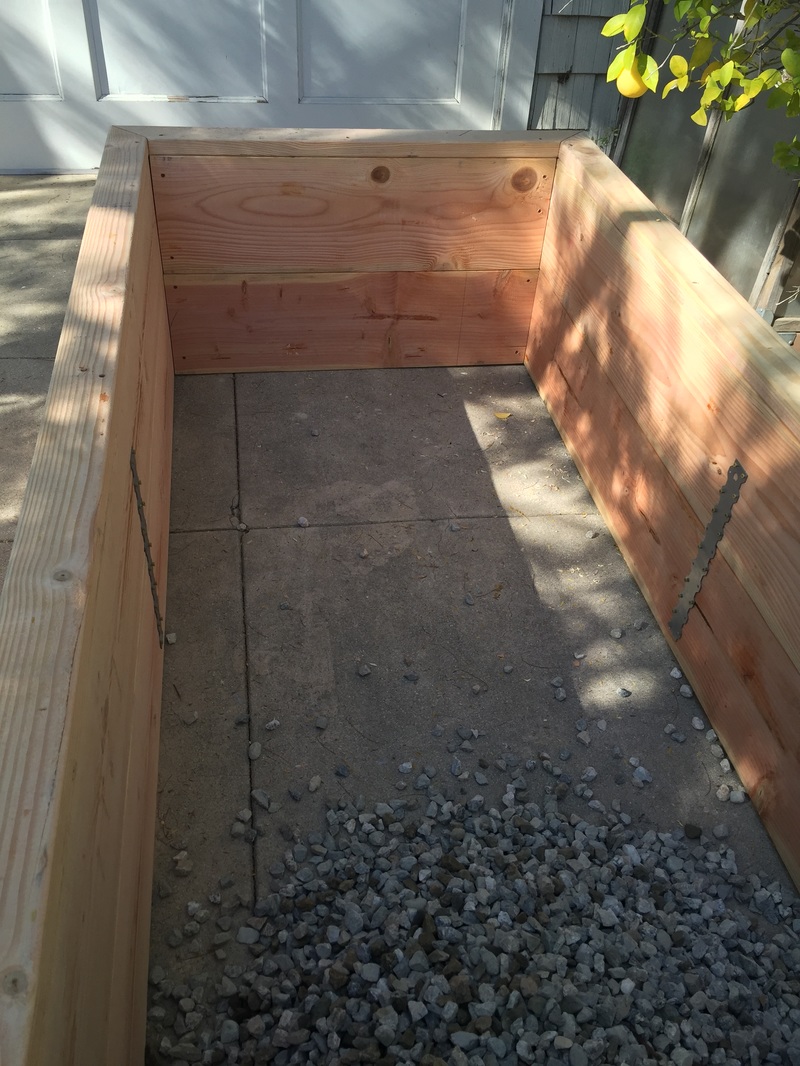
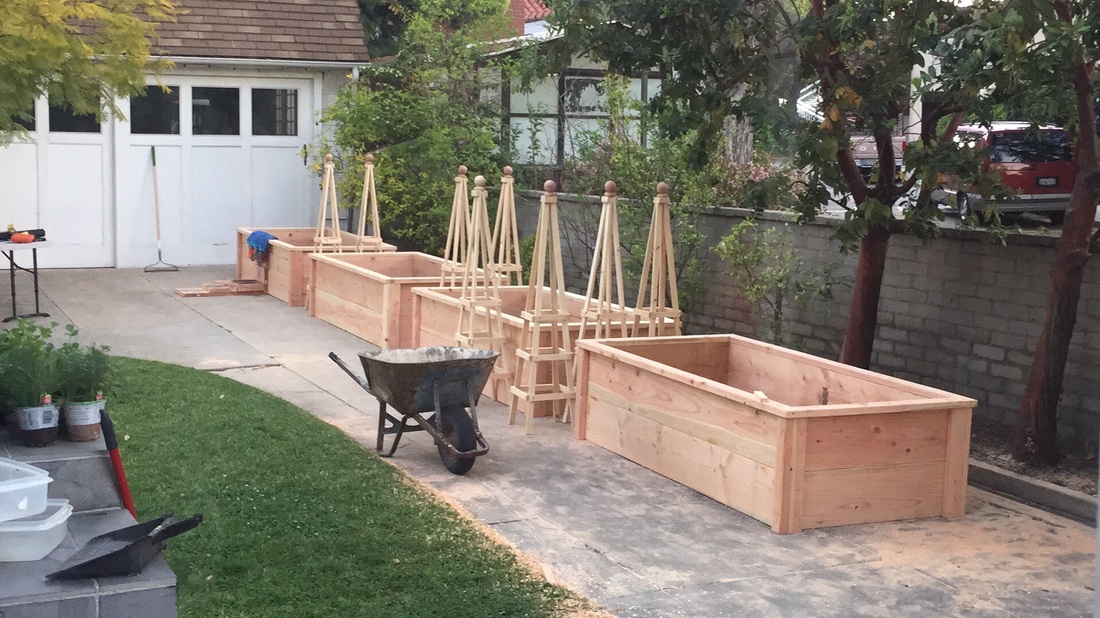
So here are my favorite new tips for the iPhone. 1. Create a Favorites Album If you really love looking back at old photos over and over again, just tap the small heart button on the bottom of the screen. After that, a Favorites album is created and you can store photos there. 2. Optimize Your Battery Life Instead of carrying around an extra charger to extend your battery life, find out which apps are consuming too much power. To get there, go to Settings > Battery. In that section, you'll see just which apps are killing your iPhone's battery, so you can close the app if it's open or delete items like photos and songs. While you're at it, make sure to follow these other tips to save your phone's battery life. 3. Get Siri to Read You Everything Siri deserves much more credit than she gets, considering she can read out loud. To get Siri to speak chunks of texts, head to Settings > General > Accessibility and, in the vision section, turn on Speak Selection. After it's on, you can highlight a passage and press "speak" to hear Siri read to you. Another option is using "speak screen," which will make Siri read the entirety of your screen once you swipe down on the screen with two fingers. 4. Make Siri Remember Certain Relationships Siri can also learn certain relationships that make calling, texting, or emailing much easier. Just press down on the home button until Siri opens up, say "[Name here] is my [brother, sister, mother, etc.]," and she will ask back to confirm the relationship. 5. Have Your Medical ID Ready For Emergencies While not everyone likes HealthKit, you should definitely add your information into the Medical ID tab. If there's ever an emergency, someone can see any allergies or medications you're taking, as well as a contact to call. Thanks to popsugar for coming up with these great ideas! Although I am a full-time artist I do occasionally tackle projects that are non-art related. This past weekend I built a raised vegetable garden. Or, as my son Matt called it, "a community garden". I have raised some vegetables in the past but mostly just tomatoes, basil and a few other fresh herbs. On my recent trip to Washington D.C. I was lucky enough to attend a film festival at American University about farming, a farm to table restaurant and organic vegetable gardening. By the time I walked out of the theatre I knew I had to have a vegetable garden again! (Thanks Steph for the inspiration!) I spent a lot of time on the internet researching raised vegetable gardens and chose this photo for my inspiration. 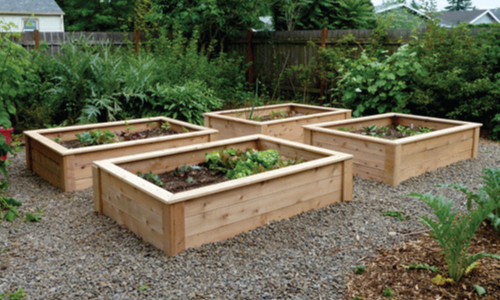 Fortunately my amazing handyman from Ventura agreed to come to Pasadena to build the boxes. Because I was going to place the beds on the concrete driveway in our backyard, the boxes had to be 24" tall (for root growth) and needed about 3" of rock in the bottom of the beds (for drainage). I also ordered rock and super organic soil (especially created for vegetable gardens) from Whittier Fertilizer which was delivered Saturday afternoon.
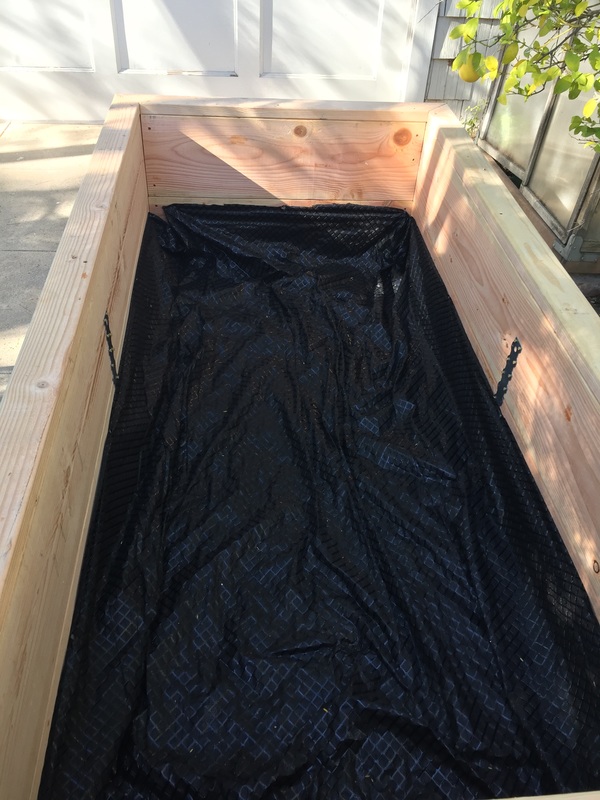
We started at Home Depot at 7:30am and somehow managed to purchase the lumber, load it on Rudy's van and start assembly by 9:00am. Rudy made the beautiful wooden beds and I made the tomato cages. My inspiration for the tomato cages came from here. I made my cages a bit smaller. They are 5' tall and the bottom measurement of each side is 14". The wooden side slats measure 12", 10" and 8". They weren't hard to make but they just took a long time and I have some painful blisters on my hands as proof that I built them! Cost per tomato cage was $4.00 or $9.00 with the finial. Once the beds were assembled I shoveled the rock into a wheelbarrow and filled the bottom of each bed. Then I lined the bottom with landscaping cloth and stapled it to prevent soil from leaking out of the bottom of the bed when watered. See photo above. Finally, I added the soil and the beds were ready for planting. Check back later in the week for more progress and photos of my vegetable beds with tons of growing vegetables! Technically I was on vacation last week and I wasn't supposed to be working (like that ever happens!) So I decided to take a week off from writing my blog. The good news is I really missed it!
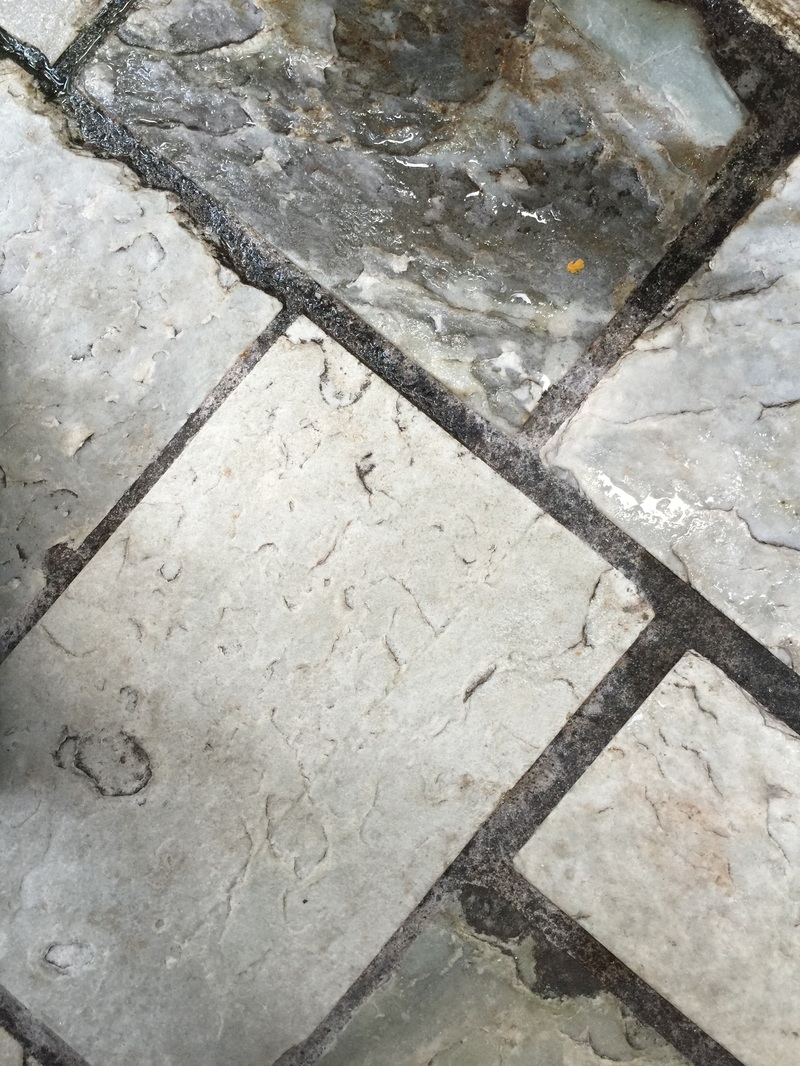
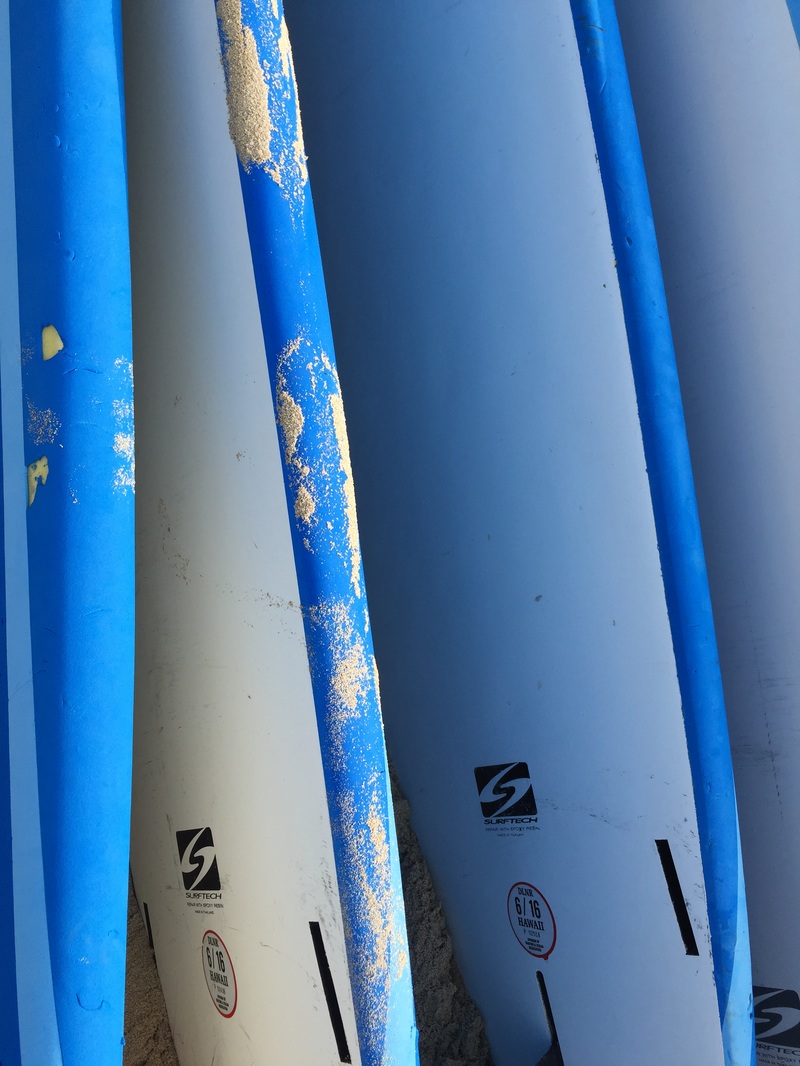
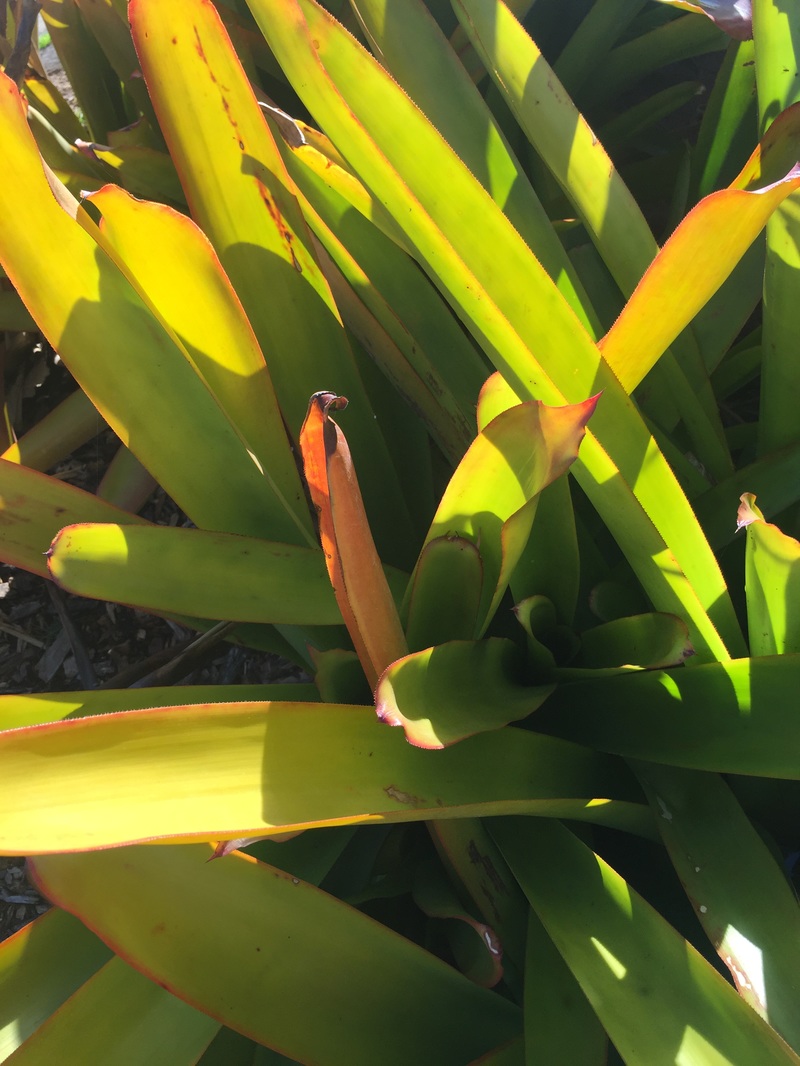
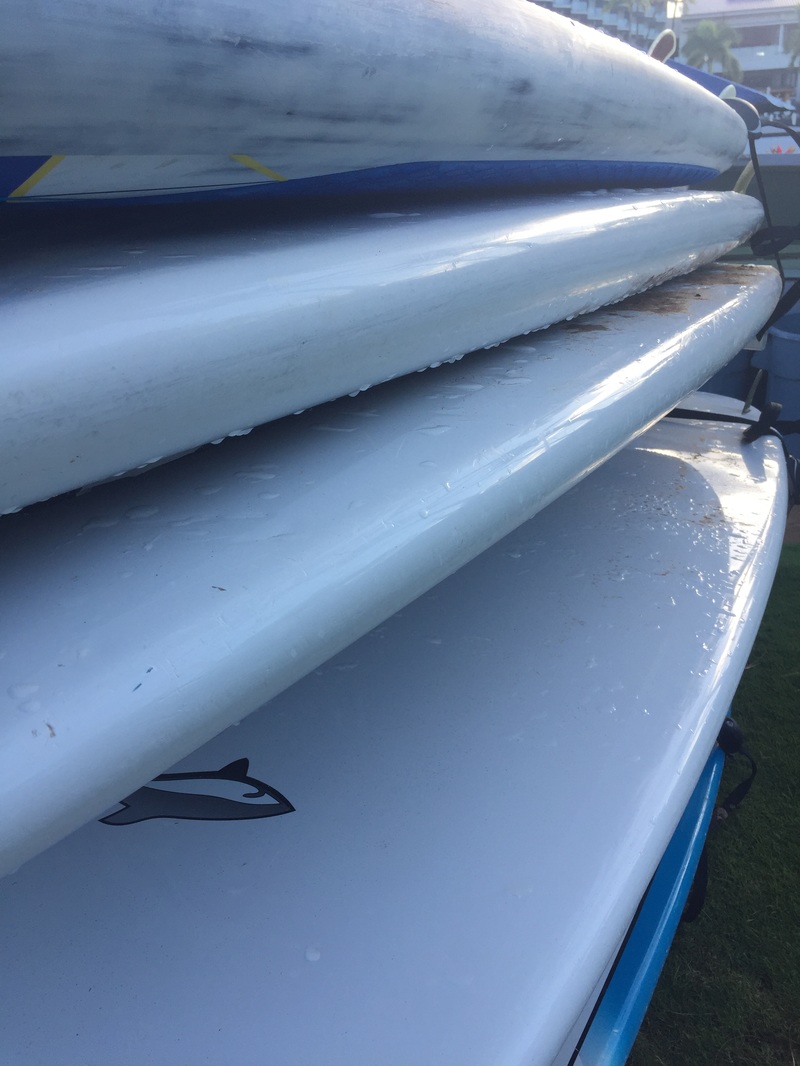
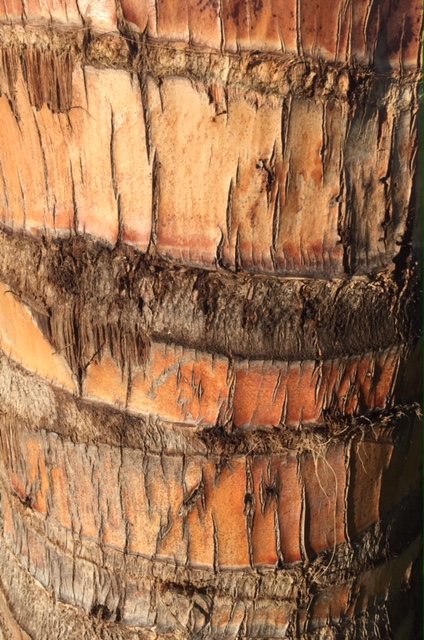
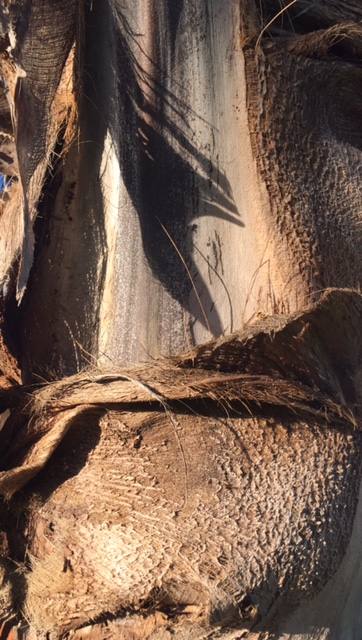
This week is going to be a crazy one ... I am teaching a three day palette knife oil painting workshop, I have a big project in my backyard (more about that later) that needs finishing and I have a 48" x 48" commission that I need to complete. Oh my. Meanwhile, I thought it might be fun to share some of my abstract inspirations from Hawaii. The photos above were all taken with my cell phone while I was wandering around Oahu and Maui. Can you guess what they are? From the top left, left to right Row 1. teak chair, concrete walkway, sand footprint Row 2. surfboards, hawaiian plant, surfboards Row 3. coconut tree trunk, coconut palm, hawaiian plant Which one is your favorite? Which one do you think I should use for an abstract painting this week? And by the way, are you looking for inspirations everywhere you go? |
Leslie
Mom. Wife. Artist. Marketer. Teacher. Radio Show Host. Archives
July 2017
Categories
All
My Favorite Things 
 
Some of my posts contain affiliate links for your convenience. Click here for full disclosure.
|


 RSS Feed